» Need Electrical Help? Ask the Electrician
Electrical Repairs - Part 3
 |
Summary:
Emergency electrical repairs using the heat shrink method makes a good tightly fitted insulated covering that helps protects the wire repair in this accessible electrical junction box also known as a ground box enclosure.
© By: Dave Rongey |
The Heat Shrink Method for Electrical Repairs of Direct Burial Cables
NOTE: Identify your Power Source and make SURE the Power is OFF!
Ground Box Enclosure for Electrical Repairs of Direct Burial Cables
Here is a quick overview of the installed junction box to make this able repair accessible. This repair was for a set of #8 Gauge wires serving a water pump submerged in a pond. The buried Power and Communications conduit was not buried at the required 18 inch minimum and was snagged by a tractor. Because of the break in the conduit, I decided to place the cable repair into an accessible junction box. The cable repair method was crimp sleeves and heat shrink tubing. Below you will see a summary of the process.
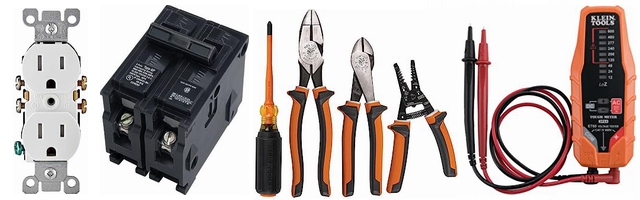
Tools for Electrical Repairs of Cables using crimp sleeves heat shrink tubing |
||
 |
 |
 |
| Shrink Tubing and crimp sleeve |
Cable Crimping Tool | Heat gun to shrink the tubing |
Size the Crimp Sleeve to the wire gauge, and the Shrink Tubing to the Crimp Sleeve.
Select the Crimping Tool to the Sleeve Size.
The Heat Gun or Torch can be used as approved by the Shrink Tubing specifications.
| The Ground Box Enclosure Process: | |
 |
 |
| Dig a hole large enough to accommodate the size of your ground box so that the cover will be level with the grade of the soil.
Prepare the wires to receive the crimp sleeves being careful to strip back the insulation so the end of the wire will reach all the way to the mid point of the sleeve. The manufacturer has placed a crimp in the middle as a stopping point for each wire. |
Making sure the wire is all the way to the mid point, crimp one side of each sleeve. Size the shrink tubing to the longest side of the exposed insulated portion of the wires, but allow room for the remaining side of the sleeve to be crimped. Slide the shrink tubes onto the long side of each wire and crimpthe opposite side.Slide the shrink tubing over the crimp sleeve so the center area is covering the mid point of the crimped sleeve. |
Caution! |
|
 |
Caution! The heat gun or torch can be hot enough to burn you, and could ignite your clothing. |
| Take preventive safety measures. | |
One by one, carefully apply heat to the center area in a circular motion to distribute the heat out toward each side, while working the heat around the wire, being careful not to overheat the shrink tubing. As you see the tubing shrink, move the heat towards the outside on one side. Repeat the process for the opposite side of the wire.
 |
 |
 |
 |
 |
 |
Ground Box Enclosure Considerations
The plastic box shown above can be used in areas which have foot traffic but is not intended for heavy traffic, livestock or vehicle traffic areas. Areas of high traffic should be equipped with a concrete box, and heavy weighted traffic areas, such as vehicle traffic, should be equipped with heavy gauge steel traffic lids. Bolted and secured lids would be advised for livestock areas.
Always consult your supplier to assist you when selecting the proper ground box for your application.
| The electrical enclosure box area should not be submerged, in standing water areas, or under water at any time. Keep the inside of the box as dry as possible. Placing a layer of gravel in the hole before placing the box in position will help the box to drain any condensation. The gravel depth should be taken into consideration when planning the depth of the hole. |
|
||||||||||