What you should know about Recessed Lighting for Your Home |
|

|
Lighting Fixtures: NEC 410-66 Recessed lighting fixtures installed in insulated ceilings or installed within 1/2inch of combustible material shall be approved for insulation contact and labeled Type IC. Most State Energy Codes require that all penetrations through an air barrier be sealed so that the interior air barrier is maintained. Sealing applies to all penetrations including the service entrance, conduit, cables, panels, recessed luminaries, electrical boxes, and fan housings. |


Step 3 - Removal of the light socket plate assembly. |
|
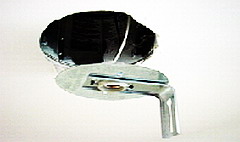 |
When the wing nut is removed, the socket bracket assembly plate can be lowered out of the recessed fixture enclosure. |
Step 4 - Removal of the light socket. |
|
 |
The lamp socket is removed from this assembly simply by squeezing together the two metal brackets that hold the socket in place to the metal plate. |
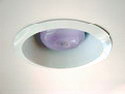
Step 5 - The socket is now ready for the can light trim. |
|
 |
The lamp socket is now ready to be inserted into a variety of trims of your choice and lighting application. |
| A typical job invoice will include an assembly of the parts necessary for installing recessed lighting and will include the fixtures of your choice and the trims that you have selected. The necessary wiring and circuit components will depend upon your individual recessed lighting installation. The recessed lights can be controlled by a standard light switch or dimmer switches depending on the recessed lights you select. Depending on the number of fixtures you decide to add, a new circuit may be required. |
NOTE: Each home electrical project requires careful planning. See our list of Helpful Low-Cost Home Project Guides: Home Electrical Project Guides |
| 410.66 Wiring Methods recessed lighting fixtures Recessed lighting fixtures installed in insulated ceilings or installed within 13 mm [1/2 ] of combustible material shall be approved for insulation contact and labeled Type IC 410-66 Lighting Fixtures recessed lighting fixtures Recessed lighting fixtures installed in insulated ceilings or installed within 1/2inch of combustible material shall be approved for insulation contact and labeled Type IC. 410-66 Recessed lighting fixtures installed in insulated ceilings or installed within 1/2inch of combustible material shall be approved for insulation contact and labeled Type IC. |
NOTE: This is a partial list of electrical codes. Other codes may apply. Some codes may be updated. See the Electrical Code area for more information: Home Electrical Codes |
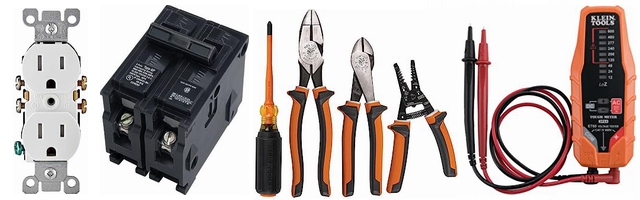
| Large Straight-Slot Screw Driver, Medium Straight-Slot Screw Driver, Small Straight-Slot Screw Driver, Awl, Lineman's Pliers, Needle-Nose Pliers, Crimp Pliers, Wire Strippers, Sheath Knife, Black Electrical Tape, Red Electrical Tape, White Electrical Tape, Green Electrical Tape, Yellow Wire Connectors, Red Wire Connectors, Ground Crimps, Claw Hammer, Volt Tester, Felt Marker | Recessed lighting. Recessed lighting trims. Light Bulbs. Wire, staples, wire connectors. Switch or dimmer switch. |
The electrical tools for each project may be different depending on the individual project requirements and the access to install electrical devices. More about Electrical Tools |
The electrical parts list will depend upon each individual project and the requirements to wire specific devices added to the project. More about Electrical Parts |